The output of the product is made from the "Storage output". Follow the steps to understand how.
Elmasys Documentation and Help Portal
Search
Documentation
Storage Output
Add Storage Output
The outputting process doings from Storage output block or from Order details. Let's see how each works.
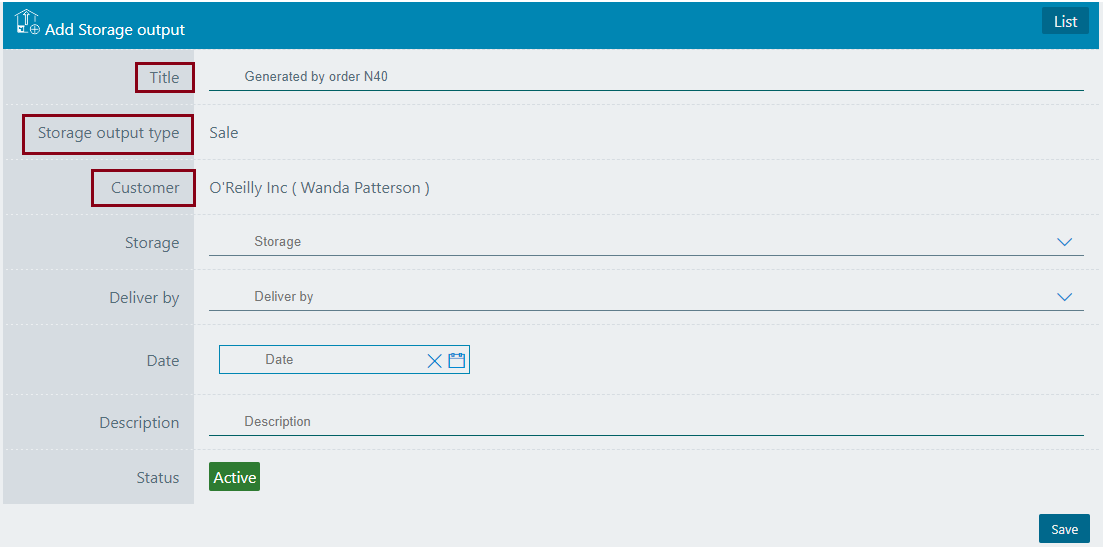
From the main menu select the "Storage Output" section then press the "Add" button and start to fill in rows:

- Title - Storage output title.
- Storage output type - Choose the type of storage output. After will open the Customer row automatically.
- Customer - Choose the customer who ordered you needed products .
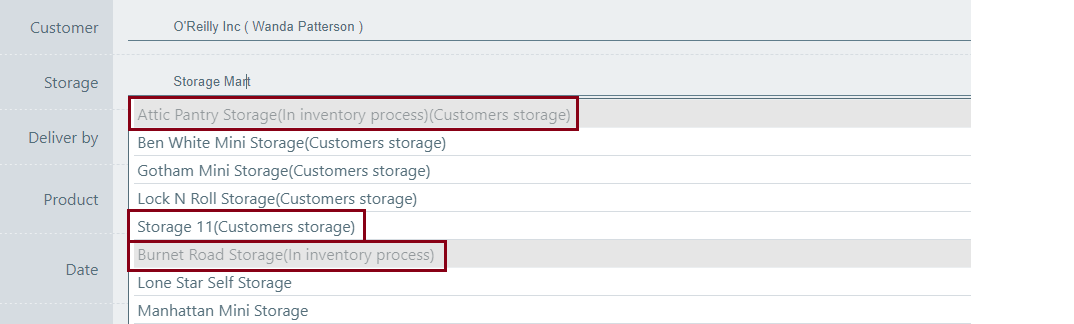
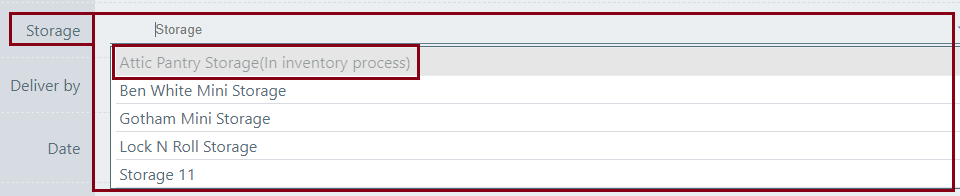
- Storage - On the Storage list at first you will see the storages which are connected to the customer you choose. The storages which in an inventory process are separated also. See the picture below.
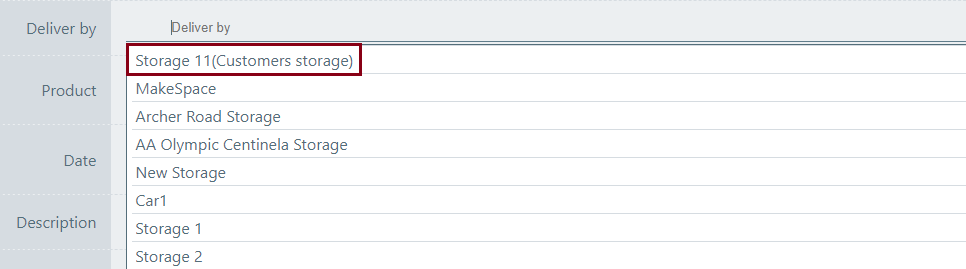
- Deliver by - Here are the mobile storages which are static. Customers storages will be shown in brackets.
- Product - Here are the products which are in the storage you have chosen. Will open the window with short information in it when you select any product.
If the selected product does not have an expiration date in this case you just need to complete the max amount, price and currency.
Remember, that the entered amount can't be greater than the current number in the max amount field, which shows the total count of your products at whole storages, excluding those products which outputted but have not reached to the customer and the customer has not confirmed it yet.

And when the product has an expiration date and it was past you will see the orange field with a passed date. At first, will be shown the earlier dates.

- Date - This is the date of output, and it should be at least one hour later than the current time. Otherwise, you will receive the wrong message.
- Description - Give a description to outputting process.
- Status - Status already set "Active" by default.
On your work process, when you will have necessary to remove any row just change the "Active" status to the "Passive"
From the Add storage output page you can go to the List and see your added row. See the picture.

Save information by clicking "Save".
Output From Order Details
From order list the Storage output button sees only the user who has permission in it.
For adding output from order details you should go to the main menu select the "Order" section then choose the needed order and click the details button.

On the top you will see the output button. Click on it.

After clicking you will be directed to the storage output. These two outputs have logical differences. But in general, both are easy to use.
Let's see the picture below and understand the differences between these two outputs.
As you see, the red mentioned fields are generated automatically from order but the title you can change if it has need. Then you just need to select the:
- Storage - On the Storage list you will see the storages which are connected to the customer you choose. The storages which in an inventory process are separated also. See the picture below.
The system will open the products which were in your order, after choosing the storage. Here you can delete the products by clicking X but you have no opportunity to add the new ones.

- Product - Here are the products which are in your order. If the product does not exist on the order list, instead of product you will see the message shown in the picture. As you cannot add the product from here, you can write another order and include the product you need. And from there complete another output.

Let's see the next picture.

- Ordered: 1258 - It means has been ordered 1258 products․
- Outputted: 0 - This is the count of the output, for the first time, it will be 0. Every time you will output the number will change.
- To output: 1258 - This is the order output number. Even if the max amount is greater than the "To output", you still cannot exceed it. Otherwise, you will receive the wrong message.
- Deliver by - Here are the mobile storages which are static and connected to the customer you choose.
- Date - This is the date of output, and it should be at least one hour later than the current time. Otherwise, you will receive the wrong message.
- Description - Give a description to outputting process.
- Status - Status already set "Active" by default.
On your work process, when you will have necessary to remove any row just change the "Active" status to the "Passive"
On the top, you see the "Product name" and next of it the:
So, you just need to complete the max amount, price and currency fields.
Remember, that in max amount field the entered amount can't be greater than the "To output" number.
When the product has an expiration date and it was past you will see the orange field with a passed date.

Storage Output List
For filter, ordering and pagination see the Note.
Note:
 - You have permission to search for any product you need with the "Filter" button. If you want to reset and return to the List page click on th section icon.
 - With ordering you can sort the rows alphabetically:
  from A - Z and
  from Z - A
 - Use the arrows for pagination
The Storage output has the following sight. There are shown the Id, Title, Storage, Customer,Storage output type, Status.
See the picture below:

Edit Storage Output
Editing is the easiest function in the system. For edit, you must go to the Menu → Storage Output → Edit.
(Click here to see how to edit.)
Click on the pencil symbol and change the row you need.

Click "Save" to save the changes.
Copy Storage Output
If you want to copy a Storage output go to the Menu → Storage output → Copy.
(Click here to see how to copy.)
Click on the mentioned symbol and copy the row you need. Changing the "Title" is required.

Click "Save" to save the output you copied.
Storage Output Details
For seeing Storage output details go to Menu → Storage output → Details.
(Click here to know more about details.)
Click on the mentioned symbol and you will see the details page. All information is shown on this page.

There you will see the storage output details, from where can go to the details of each one row. See the picture.

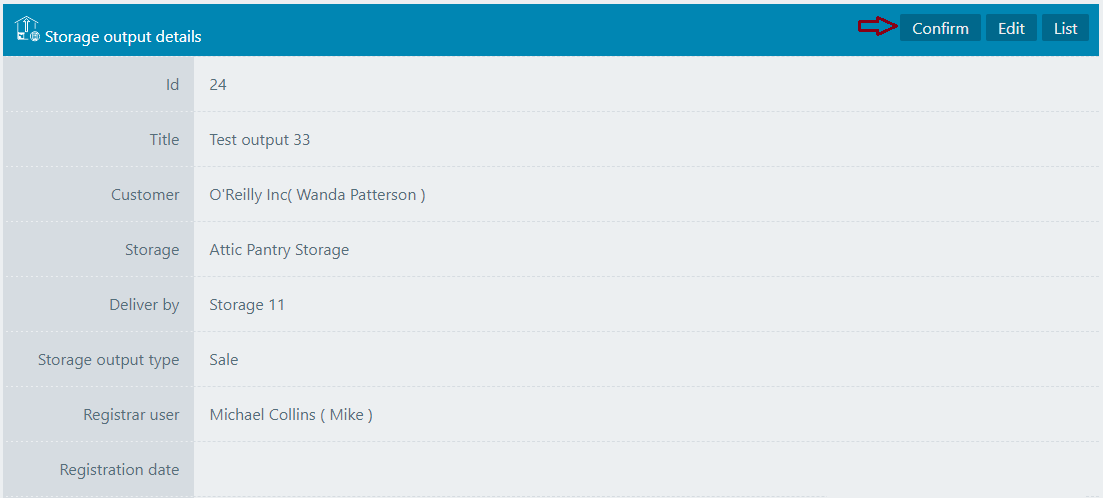
Storage Output Confirmation
There we have such an important part which is a storage output confirmation. The persons who have connected to the storages or serving the customers (the selected customer for whom created the output) will see the "Confirm" button. It is located on the top of the page, near the Edit and List button. The persons who have this permission are Manager, Storekeeper (Storage) and Manager courier (Mobile storage). Let's see what it looks like when we work as Manager, Storekeeper or Manager Courier.
At first, let's see the sight of the Storage output details in the picture.
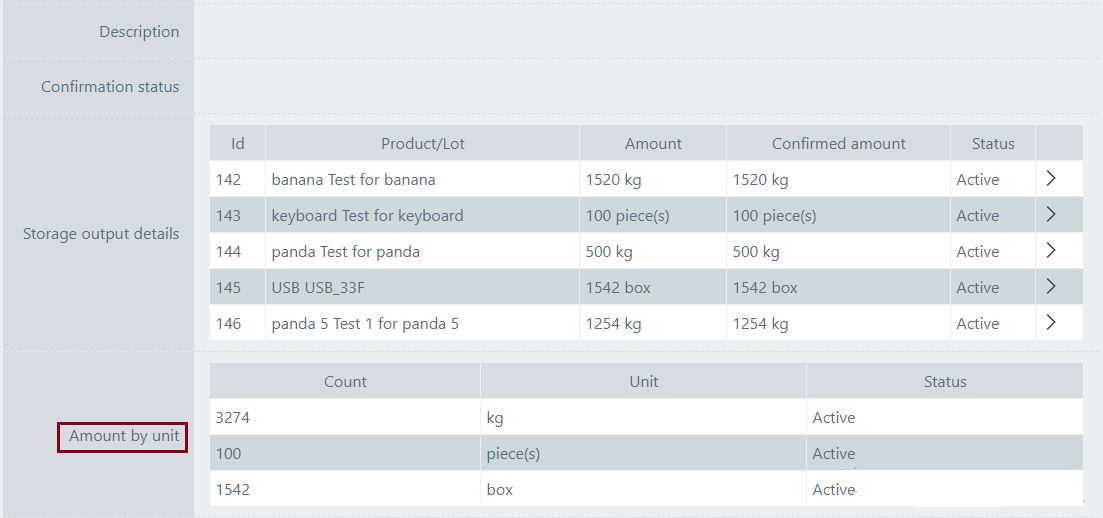

Pay attention to the "Amount by unit" row. It shows the total amount of outputted products by the unit. It's a much-needed tool for shipping.
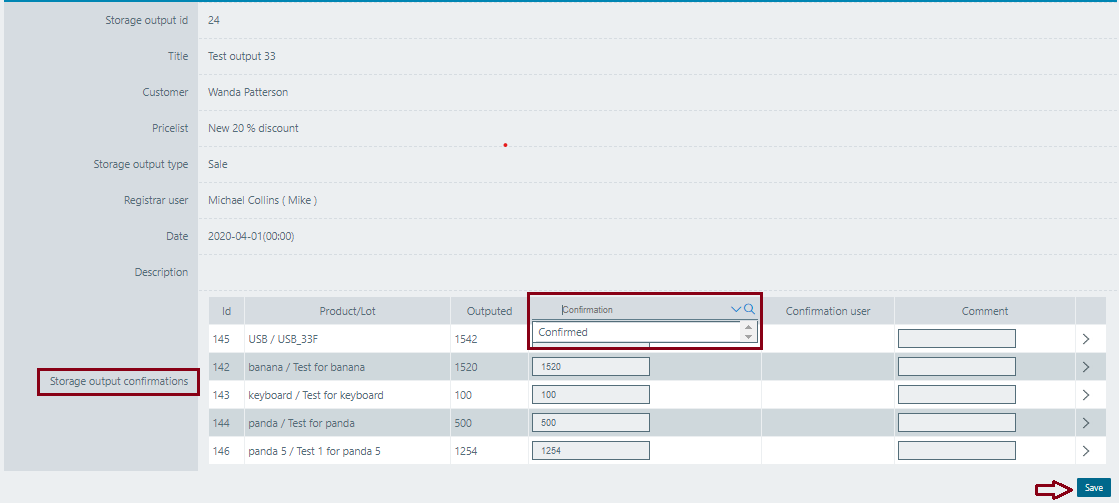
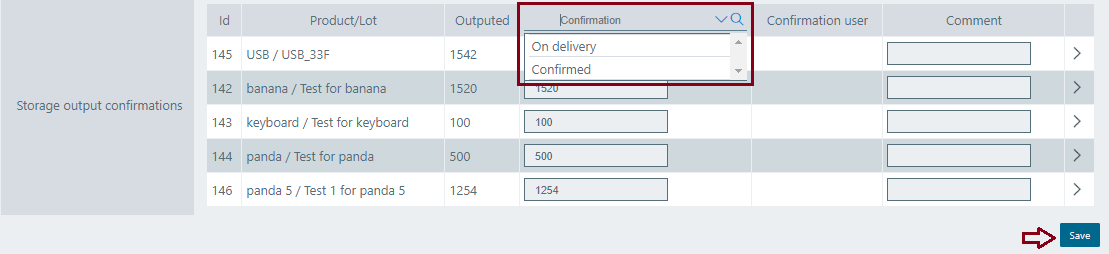
This look will see the manager on his own page. The manager has permission to do a final confirmation. Each user sees only a section that is in accordance with its permissions. So the Manager can't see and can't do any function in storekeeper's or courier's section.
Let's take for an example Id = 145 row and see that is already counted and outputted 1542 products by the manager. If the manager completes the outputted process, he will select "Confirmed", leave a comment if it has a need and saves the information. With this step the manager finished his part of outputting.
Now let's see the picture to understand what will see the storekeeper in his page.
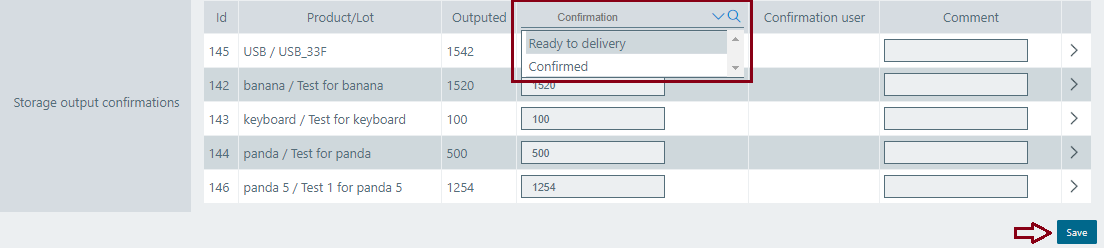
The storekeeper sees what was confirmed by the manager. The number in the confirmation section is changeable. If the storekeeper has 1540 products instead of 1542, in this case, the comment row becomes required to understand the reason and the courier on his page will see already changed number, which is 1540. So, when the comment already was written the storekeeper has two choices for finish the outputting. When the customer decides to pick up from storage needed products by himself in this case, the storekeeper will select "Confirm", it means that he confirmed a certain amount and the customer took the products from storage. In these and similar cases the storekeeper will select "Confirm".
The second is "Ready to delivery" and when select this version, it means that storekeeper outputted a certain amount of products, leave a comment or not and finished his part of the outputting process. And the next is mobile storage. See the picture.
The courier has two choices for confirmation also and there is also the same rules which were in storekeeper part. When the confirmation amount is smaller than the outputted amount, a comment is required. He can bypass the steps and select "Confirm". And when he will select "On delivery" The system automatically will move the products to mobile storage from the main storage.
As we look through all the output options, note that in the list and in the details page, the "Status" field is shown by confirmation statuses.
After the final confirmation, in the "Storage output details" will appear the "Pricing" row. which has the Currency, Total price, Discount and Final price . When you will type a Discount row, the Final price will automatically be counted by the system.

How much currency you use, that much row you will have. The total amount the system will count by currency and if there is a need for discounts for all currencies, you should do this separately for each row. This table you can use just one time, after clicking "Save" it will be no editable, so you should keep high attention during the discount process.


Follow us:


COMPANY
PRODUCT
KNOWLEDGE BASE
PROGRAMS
COMMUNITY
© 2019-2026 Elmasys International Inc. All rights reserved. Elmasys and the Elmasys logo are trademarks of Elmasys Inc AND ESoft LTD.