Inventory is a necessary operation that will be needed at every time.
Elmasys Documentation and Help Portal
Search
Documentation
Storage Inventory
Add Storage Inventory
From the main menu select the "Storage Inventory" section then press the "Add" button and start to fill in rows:

- Title - Storage title.
- Description - Give a description to the action.
- Storage - Choose the storage which are going to inventor.
- Inventor users - These users are the people who have permission to the inventor the storages and can have more than one roles. Each user sees only his created storages and only he can manage them.
- Date - This is the date of inventory, and it should be at least on hour later than the current time. Otherwise, you will receive the wrong message. There is an important detail also you should remember. When the inventory will start all the functions in the system will be stoped.
- Status - Status already set "Active" by default.
On your work process, when you will have necessary to remove any unit just change the "Active" status to the "Passive"
From the same page you can go to the List and see your added row. See the picture.

Save information by clicking "Save".
Storage Inventory List
For filter, ordering and pagination see the Note.
Note:
 - You have permission to search for any product you need with the "Filter" button. If you want to reset and return to the List page click on th section icon.
 - With ordering you can sort the rows alphabetically:
  from A - Z and
  from Z - A
 - Use the arrows for pagination
The Storage Inventory has the following sight. There are shown the Id, Title, Storage, Status.
See the picture below:

Edit Storage Inventory
Editing is the easiest function in the system. For edit, you must go to the Menu → Storage Inventory → Edit.
(Click here to see how to edit.)
Click on the pencil symbol and change the row you need.

Important:
As long as the inventory time does not begin the user who is going to inventor storages can do changes. Otherwise, the edit button will disappear and you will see only the details button. See the differences in the picture.
Click "Save" to save the changes.
Storage Inventory Details
For seeing Storage Inventory details go to Menu → Storage Inventory → Details.
(Click here to know more about details.)
Click on the mentioned symbol and you will see the details page. All information is shown on this page.

Important:
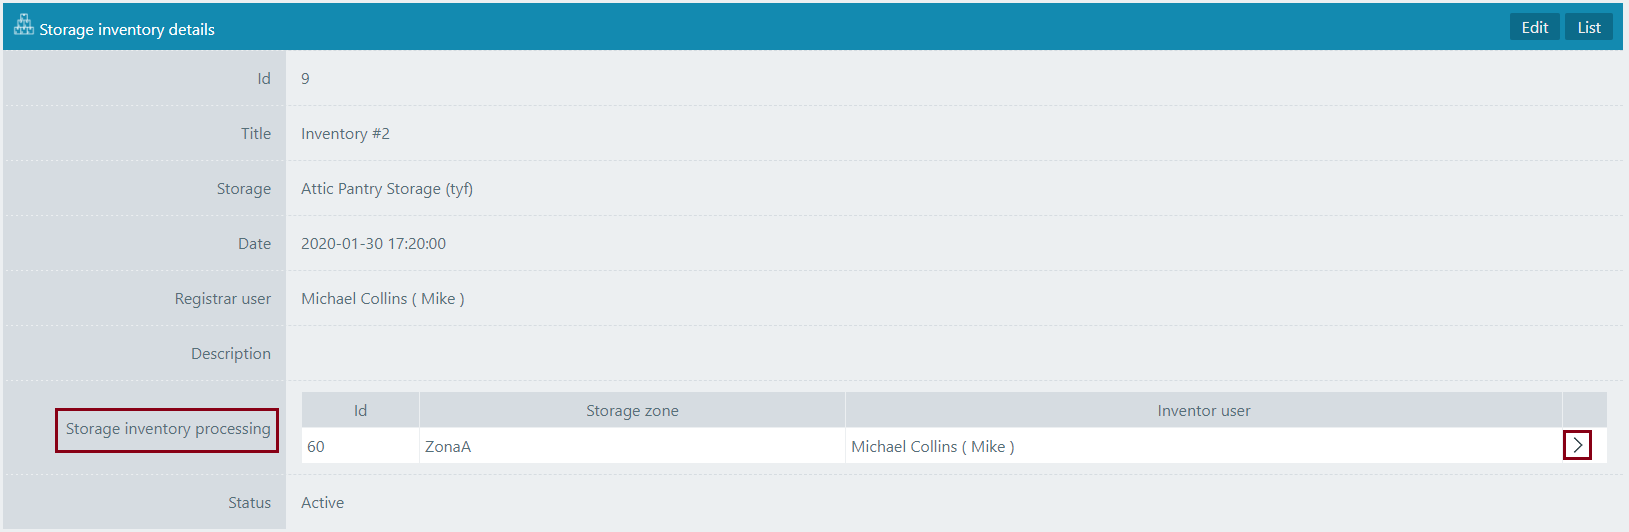
When the inventorisation will start in the details page will appear the "Add" button and this button will see only the inventor user.
It means that all the functions in the system are stoped and the user can start inventorying.
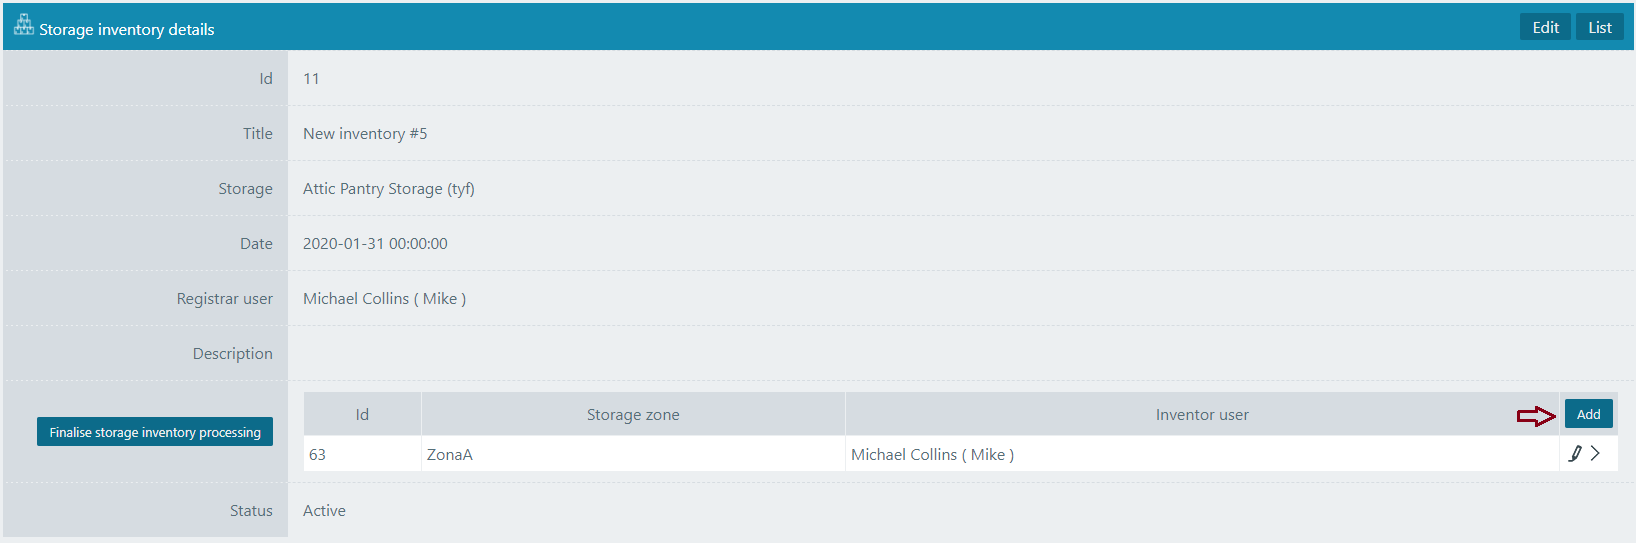
After clicking on the "Add" button will open the window where the user can see "Product" row and with select option can start inventory process. See the picture:
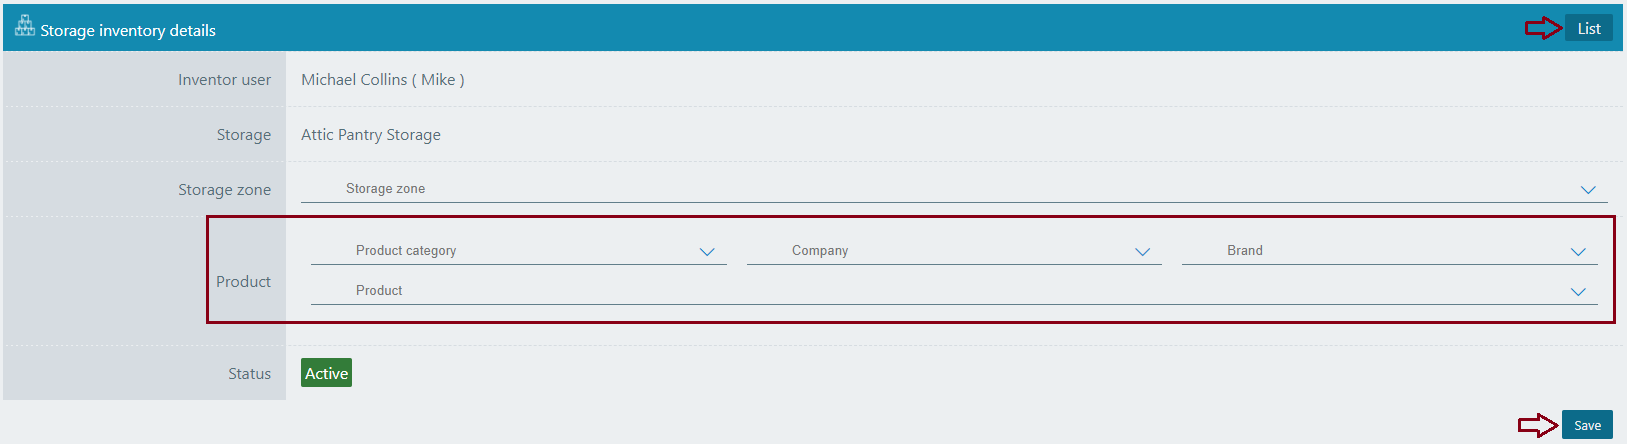
Let's choose the products and see the next steps of inventorying. Keep attention to the expiration date. When we were inputted products before, there was a row "Without expiration date" and two buttons with "Yes" and "No".
If the selected product does not have an expiration date see the first line (Without expiration date), if it has, just choose the expiration date from the calendar.
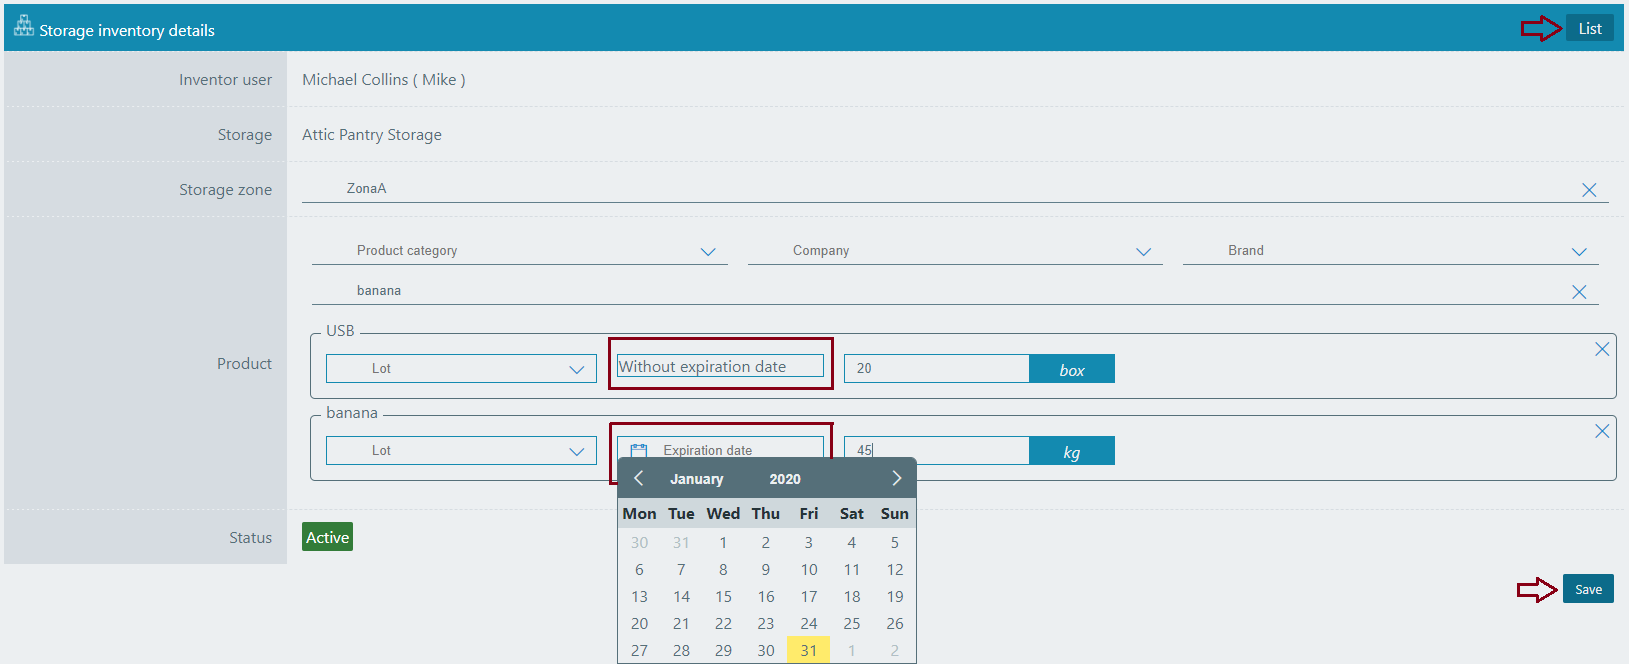
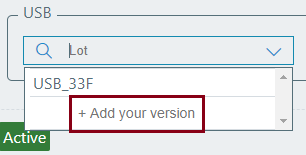
Here you can see that the system automatically opens a product lot, an expiration date and an amount. If the lot does not exist you can add directly from the same page.
Click "Save" to save all the information.
While inventorying process did not over you can edit the added products and see the details.
For editing click the button shown in the picture.

Will open the window, where you can do your changes, for example, change the count

Remember: When more than one inventor users are doing inventorisation of products in the same lot and one of them trying to edit a count the system will ask:
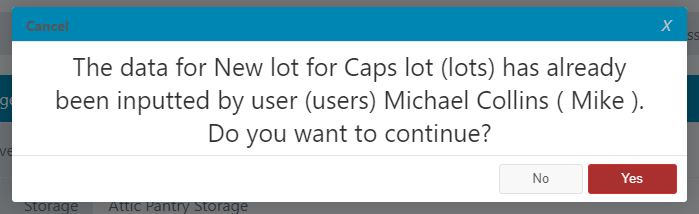
When you will click "Yes" you will be directed to the "Storage inventory details" page. Go to the details of the row you edited and find the "Storage inventory processing details". Let's filter the status to "Active" and the system will show you your new amount. See the picture.

Now filter status to "Passive" you will see the old amount which is saved in your database also. It means you don't lose any amount.
When you added all the products it's time to Finalise storage inventory processing. Click the button.
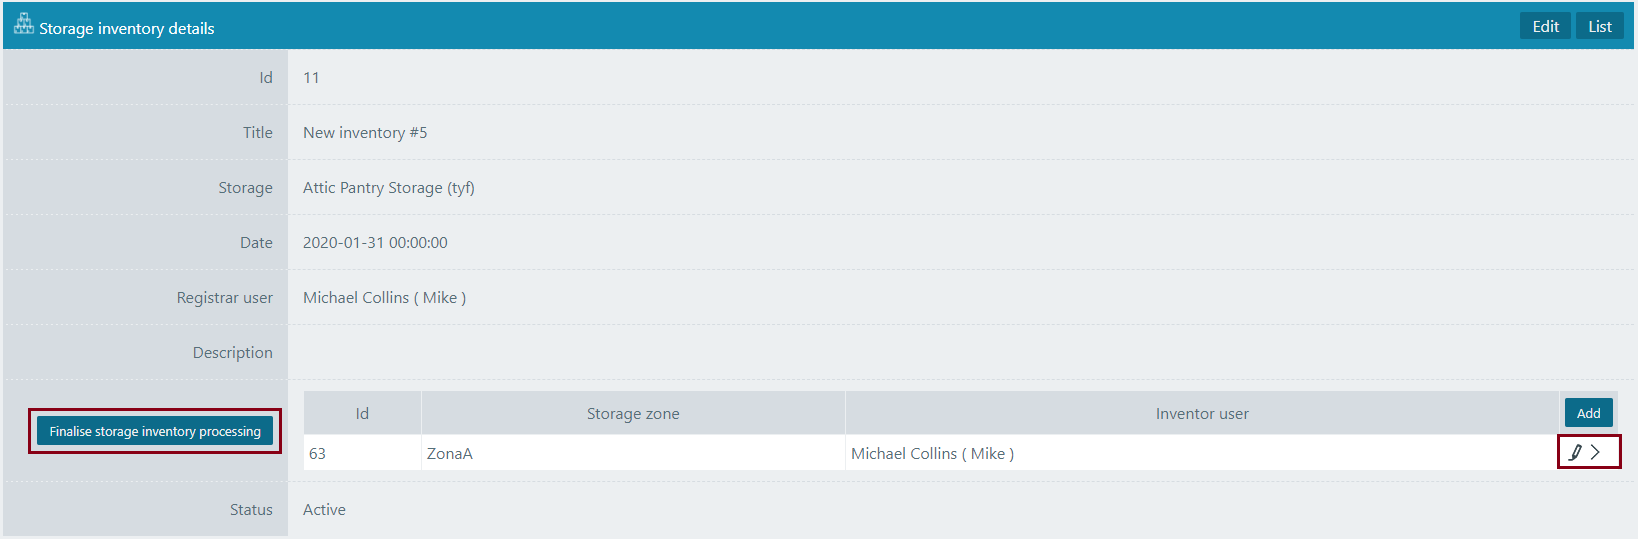
After, the system will ask:
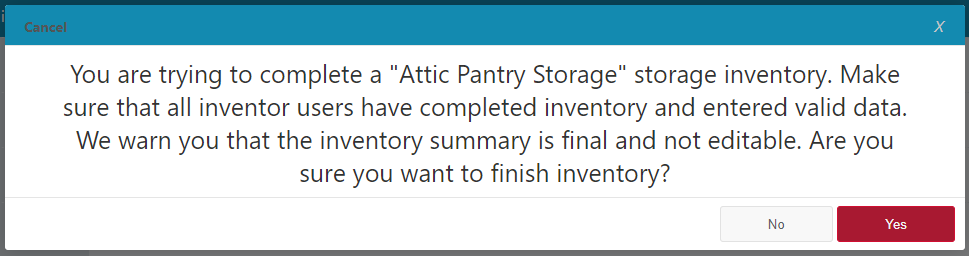
Click "Yes" if you think that inventorying process is over.
Now you can see that the button "Finalise storage inventory processing" is closed. It means that inventorying is finished and not editable.
With this logic, the inventor users should complete the inventorying of the storages.
Go to the "List" to see the result.


Follow us:


COMPANY
PRODUCT
KNOWLEDGE BASE
PROGRAMS
COMMUNITY
© 2019-2026 Elmasys International Inc. All rights reserved. Elmasys and the Elmasys logo are trademarks of Elmasys Inc AND ESoft LTD.